Access to Enonic's Content Studio
Do you or someone you know need edit webpages? You're on the right track.
Giving someone access
Enonic's User app allows admins to give other users access to Content Studio. Here's how.
- Consider which Enonic instances the new user needs access to. Production only? Test and asset servers as well?
- Consider what they will need access to. All apps? Just Content Studio? Read only?
- The new user must visit the admin URL(s) and get a 403 error message before they can get access.
- Open the Users App
- Find and edit the correct user group
- Add the new user(s) by searching and selecting
- Save your changes
- Access is given immediately. If they recently got the 403 error, they need to clear cookies in their browser, as it still remembers they didn't have access the last time
1. Open the Users App
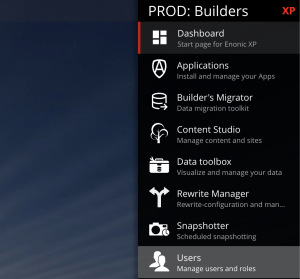
Admins can access the Users app via their website's XP dashboard.
Make sure you're in the correct Enonic instance: You will have to do this for each website the person should get access to (that includes the test environment, and the asset server).
Click it to open it.


2. Edit the user group
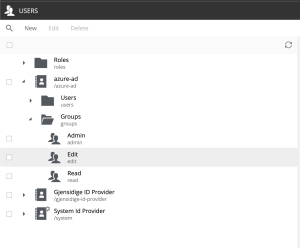
Inside the app, there will be multiple folders. You find the available user groups under azure-ad and then under groups.
Normally, there will be different user groups for different types of access:
- Admin will have all rights and access to all apps, like Rewrite Manager and Users. Not everyone needs this.
- Edit gives the user full access to Content Studio, and will be sufficient for editors with limited responsibilities.
- Read allows you to open drafts and see content without editing rights. This could be useful for colleagues who help you proofread content.
Double-click the user group you'd like to edit.
3. Add the new user(s)
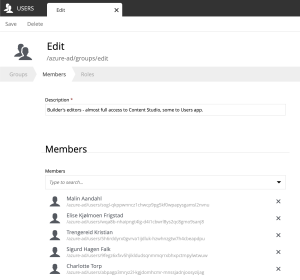
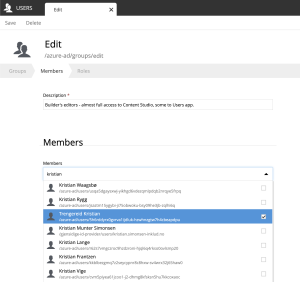
When you have opened the user group you'd like to edit, you can remove users from the group or search for users to add them.
Note that only users who have already visited the admin URL (e.g. https://gjensidige-builders-admin.gjensidige.io/admin/tool) will appear in the list. If you get no hits, you must ask them to click the link. They should get a 403 error message.
Use the checkboxes to add people to the list of users.
When you have added all users, remember to save your changes in the top-left corner.

